Thursday, September 26, 2013

Shiny things!

Good morning my Little Sunshines!  I am going to admit something to you.  I got in trouble.  My beloved Binks got on me for not blogging more and told me to get my behind in gear so we can share all our fall, fabulous fall, projects with everyone.  So this conversation got me thinking; I am like a crow. I love all the shiny and new creative projects I stumble across and they so easily distract me!  This week, I am discovering chalk paint and working on a big piece of furniture and then I just tasted maple apple pie preserves and of course I had to recreate and can them myself!  With all this mad genius creating going on I did not have an elaborate project to show you, but to get me out of doggie house I am going to share something I did on my front porch- easy and cheapie, cheap!


Ok, I realize this might not be the best photo, but I also wanted you to see that fabulash splash of color on my japanese maple.  This project is so easy, but it just really delights all my visitors.  I took a Dollar Store crow, cut a hat and collar out of some fall paper making him a total dapper Dan, then I glued his bootie to a glitter pumpkin so he could sit and greet everyone.  I have this huge bird cage from the days Binkers and I owned our store.  I should get rid of it.... it is a space sucker... but I love it and use it every so often.  So this project takes about 2 seconds, costs $1 plus the cost of a real pumpkin or a fakie you can get for 50% off at any craft store!  Give it a go and you will make someone smile when they see it.

Side note from Binkers:  I did nothing of the kind!  I may have thought it but this simply proves that Diva Doggie and I are perfecting our mind melding experiments so that is a good thing!

And PS Diva Doggie is a total crow!


Saturday, September 21, 2013

Fun DIY Santa Painting!

Believe it or not, Diva Doggie and I are already talking about how we are going to decorate the airstream for Christmas!  That led to excitement over the Christmas parties we will go to which led to what we should do for Hostess Gifts this year.  How many bottles of wine with an ornament around the neck can you give before you start feeling in a rut?  We are here to help you!  I am about to show you how to do the cutest little painting of Santa step by step!  Yes you can do it!  Stop whining!  PLUS, you can tell the lucky hostess (or smile smugly to yourself when you keep one for yourself) that you painted it just for her!  You will be seen as going to so much trouble which will mean fabulash Harry and David baskets will be showing up at your door to reciprocate!  YES!

So here we go!  Here is what you will be painting to give you a reference point:


So Precious!

Here is your supply list:

5 x 5 Gallery Wrapped pre primed canvas (For the purpose of the blog, I cut a beam I had on hand into a 5 x 5 square.)
Black Craft Paint
White Craft Paint
Brown Craft Paint
White Dimensional Paint
Cheap Paint Brush


Step One:  Paint your canvas black.  Include the sides in this.


Step Two:  Mix as much or little white paint with the brown to create a skin tone you are happy with and do an elongated tear drop for the nose.  


Step Three:  On either side of the nose, create the shapes you see below for the cheeks.  Make sure you do not mix it with the nose but make the shapes beside the nose.   Diva Doggie always giggles at this part but that is because she has the sense of humor of a 12 year old boy.  Just do it and stay with me.

Step Four:  Eyebrows!  You will basically be following the line of the upper part of the cheeks with your white paint.  Remember, this does not have to be perfect!  This is supposed to be adorable!   Again, remember to get close to the cheek to leave the black showing through!


Step Five:  The Moustache!  Again, use your white paint to follow the lines of the cheeks while still allowing the black to show as a kind of outline.


Step Six:  The Beard!  I like to start from the outside in.  It is ok to allow some of the black show through for character.  Work from the outside in and don't worry if the point of the beard isn't centered..it's all about character!


Step Seven:  The Fur Trim around the Hood!  You are basically going to take the white paint and follow the lines of what you have painted so far.  Give it a slight peak at the top and vary the width of your strokes.  Easy Peasy!  You can do it!  We are almost done!!!


Step Eight:  The Red Cloak!  Simply follow the top with your Red Paint to make the peak of his hood and then follow the look below to create the shoulders.  You can make him fatter by bringing the shoulders out all the way to the edge of the canvas.  I just realized my Santa looks like he could use a sandwich!


Step Nine:  Rosy Nose and Cheeks!  Mix a tiny bit of your red paint with the brown and white you mixed for the skin tone and swirl it on the tip of the nose and around the bottom of the cheeks.


Step Ten:  Add Snow!  Use your White Dimensional Paint to put dots of snow around the figure and VOILA!  You Are Done!!!

We would love to see your beautiful creations!  If you like this, we will do more similar paintings for you to copy, give, and enjoy!


Friday, September 20, 2013

Glam Thanksgiving Dinner Part Deux

There is nothing Diva Doggie and I enjoy more than details.  For today's project, we decided to pimp out some napkin rings for our 1920's Hollywood Glam Themed Thanksgiving Dinner.  Why not buy fabulous napkin rings, you ask? Well, we found a set of four we absolutely loved and guess what!  They were on sale for $199!  Considering we need 12 of them, we opted for making our own!

Once again, to get you excited, here is a photo of the finished product:

Gorgeous, right??

We found the how to for making the 'brooch' here:  http://www.youtube.com/watch?v=i9puwAsBJZM

They are super easy and we love the woman's accent which we felt made these even fancier!

For the 'ring', we used a plastic glittered ribbon we purchased from Sam's Club but you can use your imagination for that!  We purchased the pearls, gold bead ribbon, and crystal bead for the center from Michael's during their 40% off all beads and findings sale (which goes on pretty regularly!)  See below:


This was a super simple project that we busted out while watching our favorite On Demand Trash!  Deelish!

We will continue to keep adding the little elements we are making for this Glam Theme so keep checking us out...we will always have a glass of wine and an extra glue gun!


Thursday, September 19, 2013

Fall, Fabulous Fall

Binkers!  Can you believe it is September already?!?!

Diva Doggie!  Put down the wine!  We are almost in October!!!.

I love when September arrives, we get all squirrlied tailed and madly creative.

OK, we are going to go with it just being the beginning of September!  But yeah, it is beyond time for us to be getting after it!

Agreed!!  We have to throw open the doors to Binkers and Diva Dog land and invite everyone in!

Yes! Yes! Yes!  To the studio!

Wait, Binkers I have concocted the most fab bu bu master plan for us-go with me here....

Hit me..

Ok, I want us to purchase a vintage airstream, jack it out like an old time gypsy carni wagon then tour the country selling your works of art for quid!

OK, let me get this straight, you want me to invest in a "vintage" camper, live like a carni and do all the work painting to support us??  OK wait...so you can drive us around and I will paint!  I will paint YOU!  You pumping gas....you getting us snicky snacks at the convenience store....you cleaning the airstream...I am totally digging this idea!  I'm in!  Find us an airstream STAT!


Small DIY Floral Arrangements For An Elegant Dinner or Reception!

After a rather long hiatus, Diva Doggie and I are back in action, baby!  We are planning an elegant soiree for Thanksgiving this year and, as usual, we are both long on ideas and short on dough-re-mi!  Our theme is 1920's Hollywood Glam and, since we are starting early, we are going to make items for the table that will look like they belong with champagne and caviar as opposed to next to an RC and a Moon Pie  (not that we serve RC's and Moon Pies for Thanksgiving dinner....although we could because they are deelish....but we don't...mostly.).

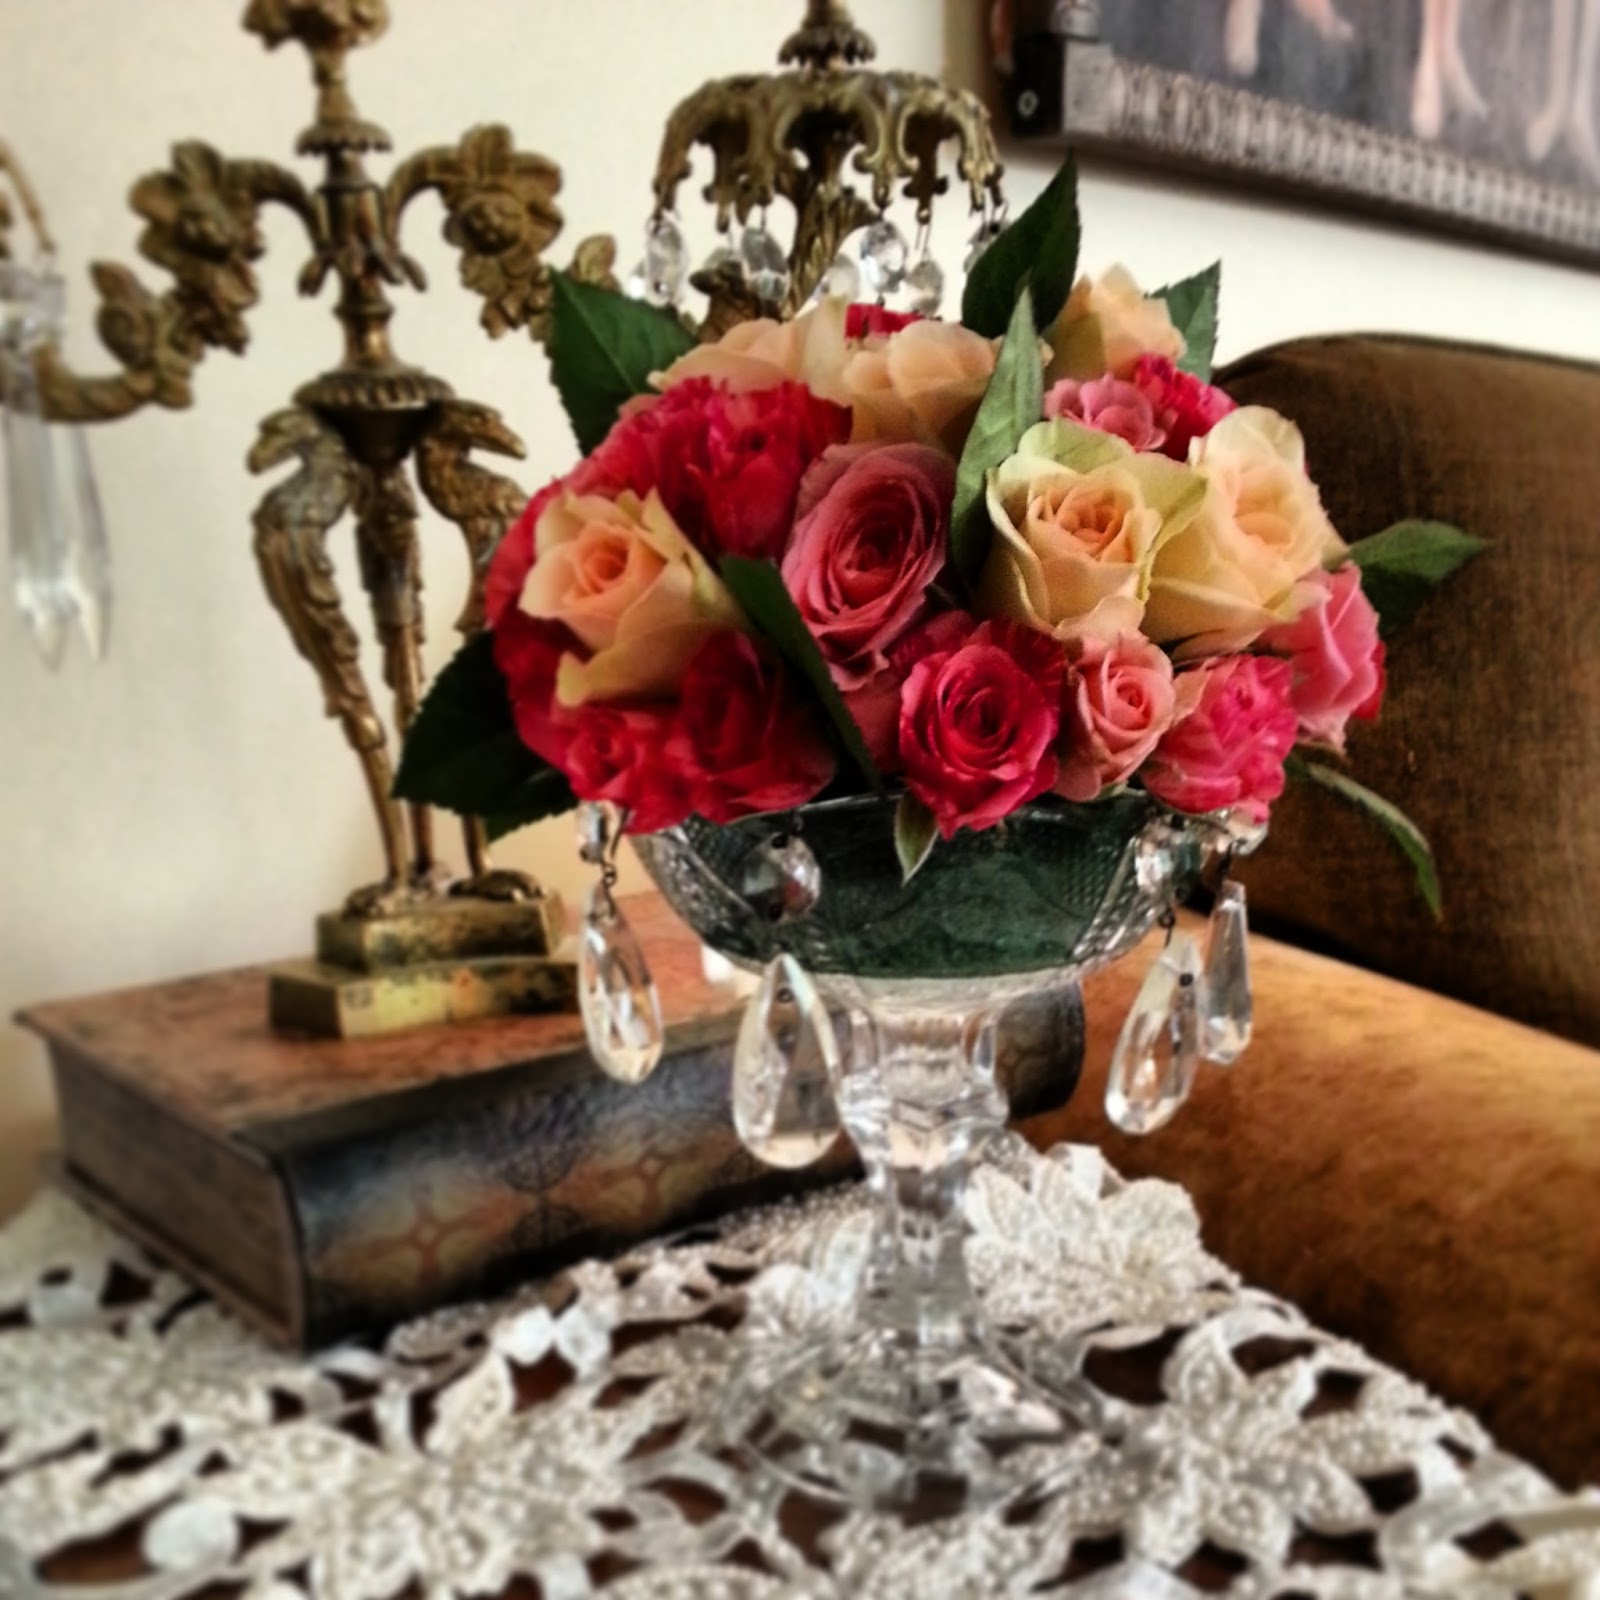
So here is our elegant finished product to get you excited to learn how to do this for yourselves:


 We are going to be creating 5 of these for the table to scatter about.  The best part about it is that, including the floral foam and crystals, but excluding the flowers, each of these cost $2.65!  We may try putting a candle in the middle and using larger flowers for the dinner but we did have these on hand and its divoon to experiment!

How To:


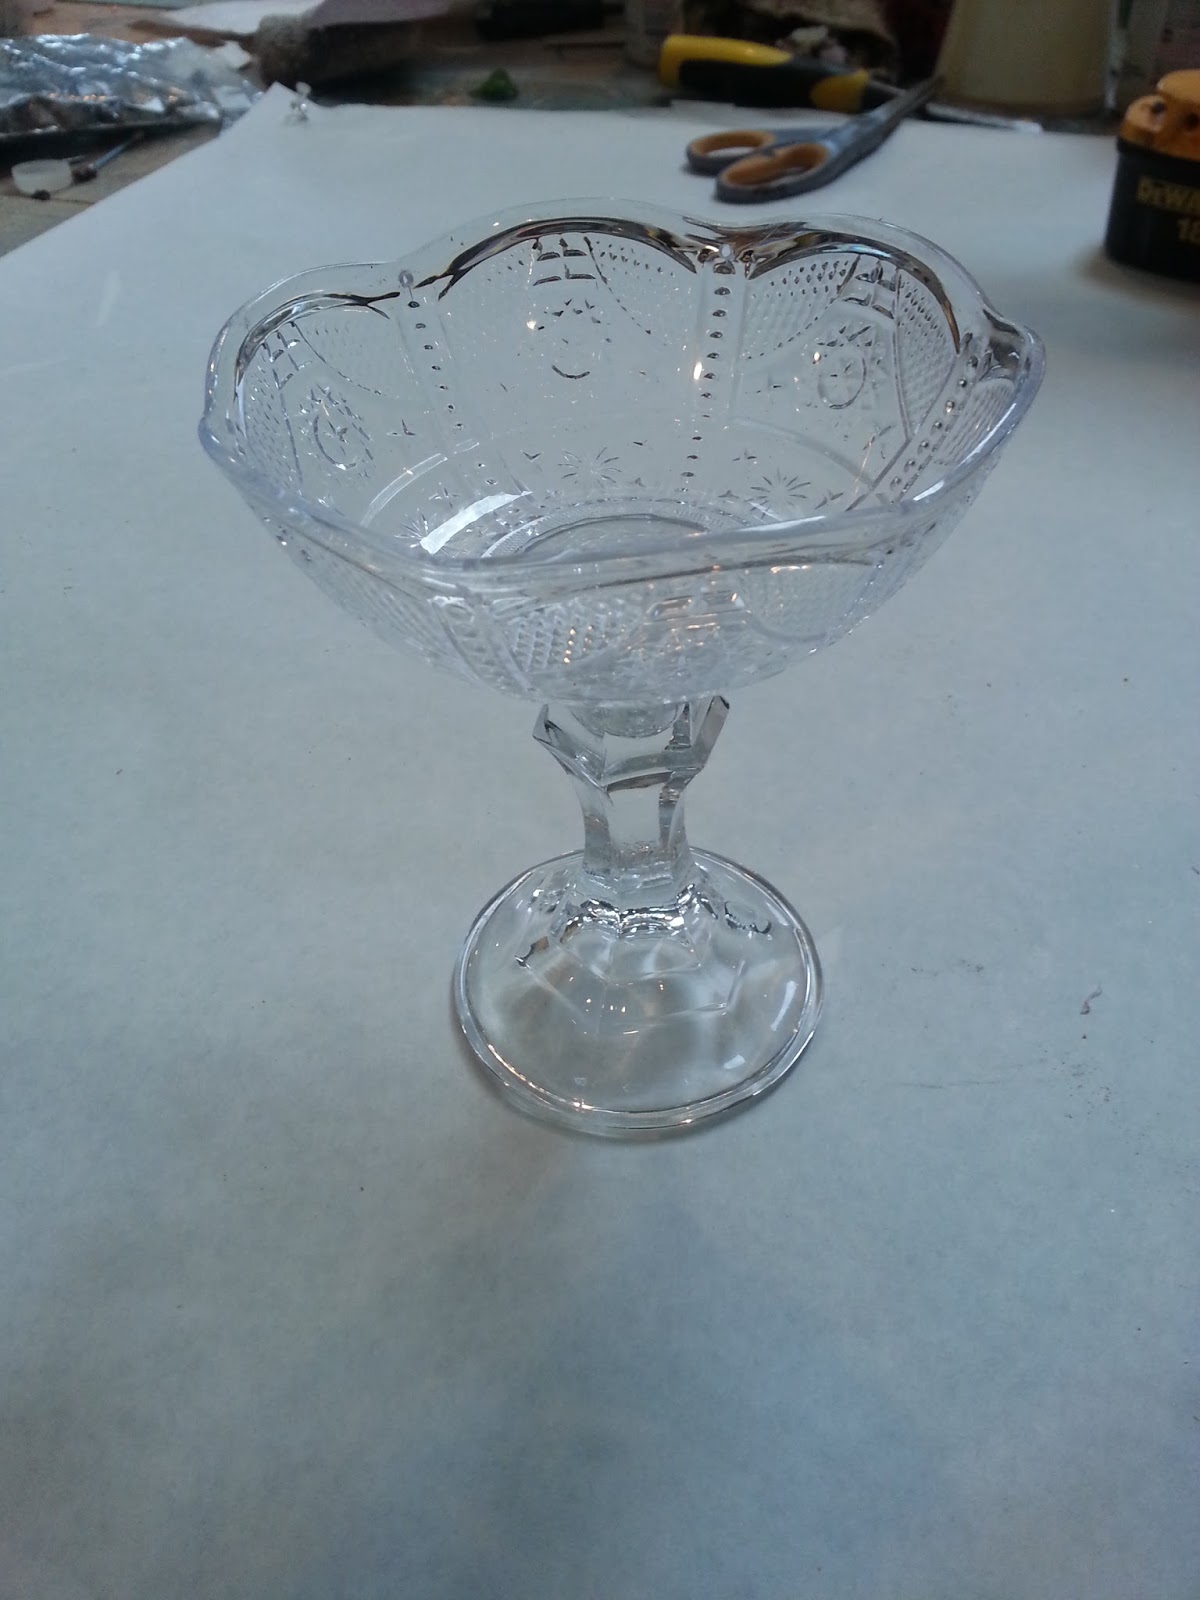
This is how simple this project is.  DD and I went skipping over to Dollar Tree and bought the glass candle holder and a pack of 4 of the cut crystal looking plastic bowls.  I absolutely love Goop for use on glass/plastic but superglue gel at Dollar Tree works well, too.  You can get floral foam there but, since we want to use live flowers, we went to Garden Ridge and bought the floral foam you soak in water.


 We drilled tiny holes at the base of each scallop with the smallest drill bit we had because we wanted to add crystal drops (I am not ashamed to say that I have amassed quite a collection from going to estate sales even though Diva Doggie laughs like a hyena every time I show her my most recent crystal drop purchase.  Who's laughing now, eh?).  I have included in the price of $2.65 for drops you can get on ebay.  Without the drops or floral foam, this is what $1.25 looks like:


These would be beautiful with stones in them and a candle for a wedding, too!  So simple and elegant and super easy to make!

Tomorrow we will post how to make elegant napkin rings on the cheapity cheap!


Tuesday, November 6, 2012

All the goodies we are working on in our magical workshop!

Hey Binker and Diva Dog fans, here is just a taste of some idea's we are currently working on for the impending holiday season.  We have snow here this morning so we are really getting excited for all that is to come in the next couple of months.  Enjoy pics, more information to follow!


These lanterns will make our Thanksgiving table sparkle with delight!   We picked up the lantern at Ikea for $7 and then the ribbon and picks from Mighty Dollar.  Our total cost for the whole project came in between $10-11!  Remember when you buy picks to use in this manner, cut them apart and tuck them around you get more BANG for your buck.  Any hoodles, this looks like something you would see in the pages of a high end magazine spread.  When the candle is glowing, it is magical.

Our Big Fat Greek Bridal Shower!!


 Diva Doggie and I were lucky enough to host a fabulash bridal shower for the daughter of a dear friend!  Did I mention this darling girl is Greek?  And guess what!  She is marrying a delightful Greek young man!  You know what that means?  WE GET TO THROW A BIG FAT GREEK BRIDAL SHOWER!
Our goddesses were divoon!  We found directions to make an authentic greek chiton quickly and easily (see below)


 Diva Doggie and I believe everything is better with glitter so we drew greek key borders in glue and sprinkled with glitter.  We happened to have some old trim lying around that we spray painted gold for the belts!  Voila!  Serving girls for our beloved Goddess Bride-to-Be and her guests!

Our lovely serving girls greeted each guest with Nectar of the Gods in a gold trimmed flute (who knew the ancient Greeks had the technology to make plastic flutes!  Geniacs!)  It was deeLISH!  To make your own:

Nectar of the Gods
12 oz Frozen Orange Juice
`12 oz Frozen Lemonade
24 oz Pineapple Juice
2 Pints Brandy
2 Bottles Champagne

Upon receiving said Nectar, our guests were encouraged to enter Mount Olympus


Our theme colors were Fuschia, Turquoise, and White (with touches of Gold)  Believe it or not, Diva Doggie and I made the columns AND the bougainvillia!  So!  To recreate this fabulousness, lets start with the columns!


 We started with two 48" Quick Tubes we got from Lowe's.  Now, this is where you can be as adventurous and authentic as we absolutely had to be because we are insane OR you can go for option B for the Nervous and Unsure. We don't judge.  Much.   For those adventurous souls, follow me into the insanity.

We found the most amazing and cheapity cheap recipe for Paper Mache right here:  http://ultimatepapermache.com/paper-mache-clay  We love this blog.  I actually love it more than Diva Dog because I follow directions...not that I am casting aspersions...just saying....but yeah...LOVE THIS STUFF! For the Adventurous, go get this recipe and tell the blogger there she rules.  We'll wait.

ADVENTUROUS AND AUTHENTIC
Step 1:  Use your styrofoam cutter to cut 2 12" squares for each column.
Step 2:  Press your tube onto the styrofoam square (making sure it's centered) to make an indentation in the styrofoam.  Remove the tube and make the indentation deeper with the styrofoam cutter so it will stay put on the tube.  Repeat on all.
Step 3:  Triple the paper mache recipe.  We used this much for each column.
Step 4:  Cover the tube and styrofoam (except for the base of the styrofoam) with a thin coating of the paper mache.
Step 5:  To get an authentic, weathered, ancient column look, we used our index fingers to draw lines down the tube all the way around.

Perfection is not the key here.  You will love how weathered this looks!  We were thrilled!  It takes a few days to dry thoroughly but it dries very hard and sturdy!  We have thought of a million more things to do with it!

NERVOUS AND UNSURE:
Step 1.  Use your tube to draw a circle on the sides of two square boxes  (we frequently use the express mail boxes available at FedEx Kinkos).  One for the top and one for the bottom of each column.  Cut out the hole and insert the tube to create the base and the top.
Step 2:  Spray Paint the tube light gray (it doesn't matter if paint gets on the box top and bottom).
Step 3:  Use painters tape to create stripes rounding the top and bottom of each piece.

Step 4:  Spray paint everything white.
Step 5:  Allow to dry and remove the tape!  VOILA!


MORE TO COME!!!!  This was a smashing success and you must see it all!  Stay on the edge of your seat.....